Hello, fellow crafters! Get ready to hop into some serious cuteness because today we’re diving into the wonderful world of amigurumi with over 5 delightful new free crochet bunny patterns! Imagine bringing to life adorable, cuddly bunnies, each with their own unique charm – some with long, floppy ears perfect for snuggling, others with perfectly round little tails that are just begging to be squeezed. These little fluffy friends are ideal for everyone, from absolute crochet beginners looking for a rewarding first project, to experienced makers searching for a quick and charming make. They make the most heartwarming gifts for little ones, or can add a touch of whimsical decor to any room.
With these easy-to-follow patterns, you’ll learn essential amigurumi techniques like working in the round, simple increases and decreases, and stuffing for that perfect plump shape. So grab your hook, a ball of your favorite yarn, and let’s get ready to create some bunny magic together!
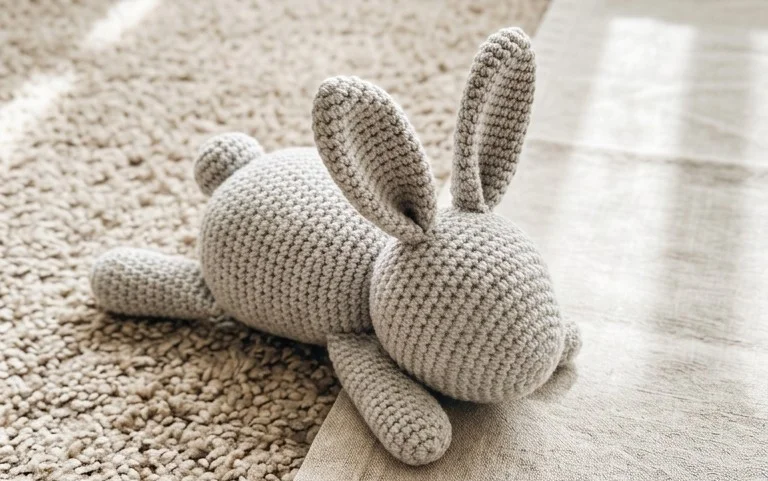
## Hop Into Fun: Discover 5+ Adorable New Bunny Free Crochet Patterns!
Spring is in the air, and what better way to celebrate the season of new beginnings and fluffy friends than with some delightful crochet bunnies? Whether you’re a seasoned crocheter looking for a fresh project or a curious beginner eager to dive into amigurumi, these five (plus!) free crochet bunny patterns are sure to bring smiles and warmth to your crafting corner. Get ready to unleash your inner bunny whisperer!
### Yarn & Hook: Your Bunny Building Blocks
The foundation of any successful crochet project lies in choosing the right materials. For these charming bunnies, you have a delightful range of options to explore, each offering a slightly different feel and look.
* **Yarn Recommendations:**
* **Worsted Weight Cotton:** This is a fantastic all-rounder for amigurumi. Cotton is breathable, durable, and holds its shape well, making it perfect for cuddly toys. It also offers a lovely stitch definition, which is important for those intricate bunny details. Brands like Lily Sugar ‘n Cream, Bernat Handicrafter Cotton, or Paintbox Yarns Cotton Aran are excellent choices.
* **DK Weight Yarn:** For slightly smaller or more delicate bunnies, a DK (double knitting) weight yarn can be ideal. It creates a finer fabric and can be perfect for creating tiny ears or intricate facial features.
* **Super Bulky Yarn:** Want to make a statement bunny? Super bulky yarns will create wonderfully squishy, oversized companions in no time! Just be mindful that super bulky yarn can make it a bit trickier to achieve very fine details.
* **Acrylic Yarn:** While cotton is often preferred for its natural feel, a good quality acrylic yarn can also work well, especially for beginners. It’s generally more affordable and comes in a vast array of colors. Just ensure it’s not too slippery, as that can make amigurumi a bit more challenging.
* **Hook Size:** The general rule of thumb for amigurumi is to go down a hook size from what the yarn label recommends. This creates a tighter fabric, preventing the stuffing from showing through your stitches. For worsted weight yarn, a 3.5mm (E) or 3.75mm (F) hook is often a good starting point. For DK weight, try a 3mm (D) hook, and for super bulky, you might even go down to a 6mm or 6.5mm hook. Always do a small test swatch to ensure your fabric is dense enough.
### Mastering the Magic: Key Stitch Techniques
These bunny patterns will introduce you to some fundamental crochet techniques, especially those common in amigurumi. Don’t be intimidated; they’re easier to learn than you might think!
* **Magic Ring (or Magic Circle):** This is the secret to creating seamless, tight circles for the bunny’s head and body. It allows you to start with no hole in the center, which is crucial for stuffed toys.
* **Single Crochet (sc):** The workhorse of amigurumi! You’ll be using this stitch to create the solid fabric of your bunny.
* **Increasing (inc):** This means working two single crochet stitches into the same stitch in the next round. It’s how you’ll gradually enlarge the bunny’s head and body.
* **Decreasing (dec):** The opposite of increasing, this is where you’ll work two stitches together to create a tighter fabric and shape your bunny. The “invisible decrease” is highly recommended for amigurumi as it’s less noticeable.
* **Slip Stitch (sl st):** Used to join rounds and finish off pieces.
* **Working in Rounds:** Most of these patterns will be worked in continuous rounds, meaning you don’t join and chain at the end of each round. A stitch marker is your best friend for keeping track of where each round begins!
### Tips for Beginner Bunny Crafters
If you’re new to crochet or amigurumi, don’t worry! These bunny patterns are designed to be accessible. Here are some tips to make your journey smoother:
* **Start with a Simpler Pattern:** Some of these patterns might have more intricate details. If you’re a complete beginner, perhaps start with a pattern that focuses on a basic head and body first.
* **Use a Stitch Marker:** I cannot stress this enough! It will be your lifeline to know where each round begins and ends, preventing you from getting lost and frogged.
* **Stuffing Wisely:** Don’t overstuff your bunny at first. Start with a small amount of stuffing and gradually add more, ensuring it’s evenly distributed. Too much stuffing can stretch out your stitches, while too little will make your bunny floppy.
* **Counting is Key:** Amigurumi relies heavily on precise stitch counts. Take your time and count each stitch carefully in every round.
* **Practice Makes Perfect:** Your first bunny might not be perfect, and that’s okay! Each one you make will be better than the last. Embrace the learning process.
* **Weave in Your Ends Securely:** Since these are stuffed toys that will be handled, make sure to weave in all your yarn ends very securely to prevent them from unraveling.
### Personalize Your Fluffle: Customization Ideas
These free patterns are fantastic starting points, but the real fun comes from making them your own! Here’s how you can add your unique touch:
* **Color Play:**
* **Classic White or Cream:** For a traditional Easter bunny look.
* **Earthy Tones:** Think soft browns, grays, or even a muted olive green for a woodland-inspired bunny.
* **Pastel Power:** Lavender, mint green, pale yellow – perfect for a springtime theme.
* **Bold and Bright:** Don’t shy away from vibrant colors! A cheerful pink, a sunny orange, or a sky blue can create a wonderfully playful bunny.
* **Stripes and Color Blocking:** Experiment with changing colors every few rounds for a fun striped effect, or create distinct color blocks for the ears, tummy, or tail.
* **Size Matters:**
* **Smaller Hooks & Thinner Yarn:** For miniature bunnies that are perfect for keychains or tiny shelf decorations.
* **Larger Hooks & Thicker Yarn:** To create huggable, oversized bunny companions.
* **Add Details:**
* **Embroidered Features:** Use embroidery floss to create different expressions for your bunny’s eyes, nose, and mouth. Try button eyes for a classic look (but be cautious if the bunny is for a very young child).
* **Ribbons and Bows:** Tie a sweet ribbon around its neck for a touch of elegance.
* **Little Accessories:** Crochet tiny carrots, flowers, or even a miniature crochet hat to dress up your bunny.
* **Different Ear Shapes:** Some patterns might allow for slight variations in ear length or shape. Experiment with adding more rows for longer ears or shaping them differently.
### Caring for Your Crochet Companion
Your handmade bunny is a labor of love and deserves a little TLC to keep it looking its best.
* **Hand Wash Gently:** For most cotton or acrylic bunnies, a gentle hand wash is the best approach. Use cool water and a mild detergent. Avoid harsh scrubbing, especially on embroidered features.
* **Reshape and Air Dry:** After washing, gently squeeze out excess water (don’t wring!). Reshape your bunny to its original form and lay it flat on a towel to air dry. Avoid direct sunlight, as it can fade colors.
* **Spot Clean:** For minor spills or stains, try spot cleaning with a damp cloth and a tiny bit of mild soap.
* **Keep Away from Pets:** While adorable, some pets may be tempted to chew on yarn. Keep your crocheted friends out of reach of curious paws.
### Beyond the Bunny: Project Ideas Galore!
These free bunny patterns are versatile and can be used for so much more than just standalone toys.
* **Easter Decor:** Create a whole bunny family to adorn your Easter table or mantelpiece.
* **Gift Giving:** A handmade bunny is a thoughtful and cherished gift for birthdays, baby showers, or just because.
* **Amigurumi Garland:** String several smaller bunnies together to create a whimsical garland.
* **Keychains and Bag Charms:** Use a smaller hook and yarn to create mini bunnies that can be attached to keys or bags.
* **Playtime Pals:** These bunnies are perfect for imaginative play for children.
* **Craft Fair Favourites:** If you sell your crochet creations, these bunnies are almost guaranteed to be popular items.
So, gather your yarn, grab your hook, and get ready to hop into a world of creative fun with these delightful free crochet bunny patterns. Happy crocheting!
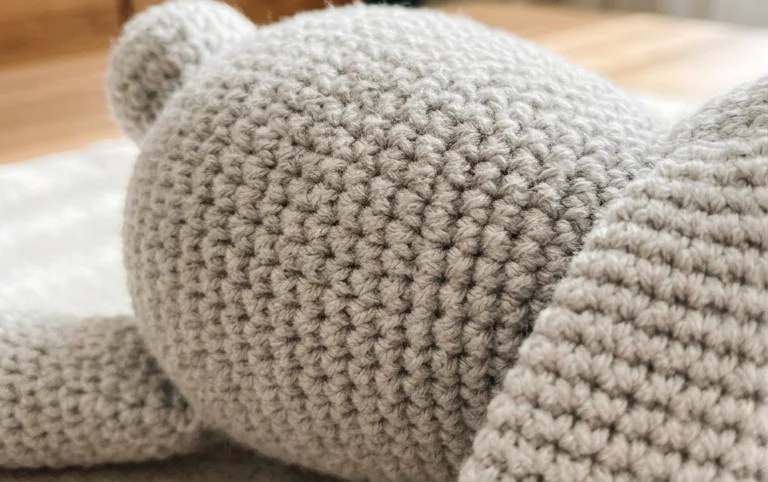
We hope you’ve fallen in love with these adorable bunny crochet patterns! Whether you’re a seasoned crocheter or just starting out, there’s a fluffy friend here for everyone. Dive in and stitch up some magic; we know you’ll create something truly special.
Don’t forget to share your finished bunnies with us on social media using #CrochetBunnyLove! We can’t wait to see your unique creations. Feel free to experiment with different yarn colors, sizes, or even add little accessories like bows or tiny carrots. Happy crocheting, and be sure to explore more delightful patterns on our site!