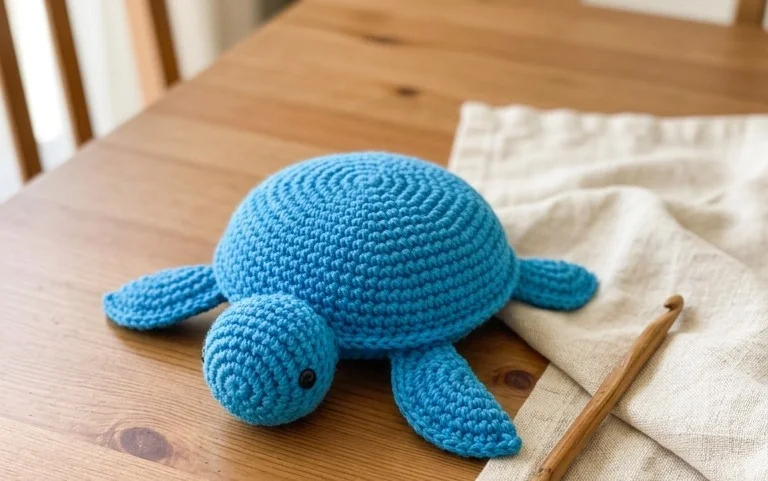
Hello there, fellow yarn enthusiasts! Are you ready to dive into a project that’s as cute as it is clever? I’m thrilled to introduce you to our latest creation: the No-Sew Crochet Turtle Amigurumi Plush! Imagine a little turtle, plump and cuddly, with a perfectly domed shell just begging for a gentle squeeze. Its sweet, simple face is ready to bring a smile to anyone who lays eyes on it.
This delightful pattern is an absolute dream for beginners looking to explore the world of amigurumi without the fuss of sewing fiddly parts together. It’s also an ideal project for crafting thoughtful, handmade gifts for little ones or adding a touch of whimsical charm to your own home decor. Get ready to learn some easy, seamless techniques that will have you creating these adorable turtles in no time!
## Dive Into Cuteness: Your Guide to the No-Sew Crochet Turtle Amigurumi Plush!
Are you ready to embark on a delightful crochet adventure that results in an utterly adorable, huggable companion? Then you’ve found your perfect project! This No-Sew Crochet Turtle Amigurumi plush is a fantastic pattern that’s surprisingly beginner-friendly, incredibly customizable, and results in a charming little friend that’s perfect for gifting or keeping for yourself. Forget complicated sewing steps; this design streamlines the process, making it accessible even if you’re just starting your amigurumi journey. Let’s get crafting!
### Yarn & Hook Recommendations: The Building Blocks of Your Turtle
Choosing the right yarn and hook is crucial for a well-formed and huggable amigurumi. For this turtle, we’re aiming for a soft, durable yarn that holds its shape well.
- Yarn Weight: Worsted weight (category 4) yarn is your best friend for amigurumi. It’s readily available, offers a good balance of stitch definition and softness, and works up relatively quickly. Cotton or a cotton blend is excellent for amigurumi as it’s less likely to pill and has a lovely matte finish. Acrylic is also a popular choice for its affordability and wide color selection.
- Yarn Colors: This is where the fun begins! For a classic turtle, you’ll need a main color for the shell (greens, browns, or even a bright teal are fantastic choices) and a contrasting color for the body (beiges, creams, or soft yellows work beautifully). You can also get creative with stripes on the shell or even go for a rainbow turtle!
- Hook Size: The general rule of thumb for amigurumi is to use a hook size that’s smaller than what the yarn label recommends. This creates a tighter fabric, preventing stuffing from showing through. For worsted weight yarn, a 3.0mm (D/3) to 3.75mm (F/5) hook is usually ideal. Experiment with your tension; if you see holes, go down a hook size.
- Stuffing: Polyester fiberfill is the standard for amigurumi. It’s lightweight, washable, and provides a good plumpness.
- Safety Eyes: For that adorable turtle gaze, you’ll need a pair of safety eyes. 6mm or 8mm sizes are typically perfect for a medium-sized amigurumi. Ensure they have backing washers to secure them firmly.
### Stitch Techniques: Mastering the Amigurumi Basics
This pattern primarily relies on a few fundamental crochet stitches, making it a great learning experience.
- Magic Ring (or Magic Circle): This is your go-to for creating seamless, tight starting circles for amigurumi pieces like the head, body, and limbs. It allows you to create a closed loop without any visible holes.
- Single Crochet (sc): This is the backbone of most amigurumi. It’s a dense stitch that creates a firm fabric, perfect for holding stuffing.
- Increase (inc): To make your pieces grow, you’ll use increases. This typically involves working two single crochets into the same stitch.
- Decrease (dec): To shape your pieces and make them smaller, you’ll use decreases. The invisible decrease (working through the front loops of two stitches) is preferred in amigurumi for a neater finish.
- Slip Stitch (sl st): Used to join rounds and finish off pieces.
- Chain (ch): Used for starting some components and creating small spaces.
Don’t be intimidated if some of these terms are new to you! There are countless fantastic video tutorials online for each of these techniques. Watching them can make a world of difference in understanding how to execute them.
### Tips for Beginners: Your Journey to a Perfect Turtle
This no-sew design is a fantastic starting point for amigurumi beginners. Here are some tips to make your experience smooth and successful.
- Read Through the Pattern First: Before you even pick up your hook, read the entire pattern from start to finish. This will give you a general understanding of the steps involved and help you anticipate any tricky parts.
- Use a Stitch Marker: Amigurumi is worked in continuous rounds. A stitch marker is essential to keep track of the beginning of each round, preventing you from losing your place and ensuring consistent stitch counts.
- Stuff as You Go: Don’t wait until the very end to stuff your pieces. Stuff each component gradually as you work, ensuring an even distribution of filling. This also makes it easier to maneuver the yarn and hook.
- Stuff Firmly but Not Too Tightly: You want your turtle to be plump and huggable, but overstuffing can distort the stitches and make it difficult to close. Stuff firmly enough so that no stuffing peeks through.
- Weave in Your Ends Neatly: After you’ve finished each piece and before you join them, take the time to weave in your yarn ends securely. This prevents them from unraveling and gives your finished plush a professional look.
- Don’t Be Afraid to Frogging: “Frogging” is crochet jargon for ripping out your work. If you make a mistake, it’s better to frog back a few stitches than to have a wonky piece. Practice makes perfect!
### How to Customize: Make Your Turtle Uniquely Yours!
One of the most exciting aspects of amigurumi is the endless potential for customization. Your no-sew turtle can be as unique as you are!
- Color Play: As mentioned earlier, the color combinations are limitless. Try a pastel palette for a baby turtle, bold primaries for a playful friend, or even create ombre effects by blending different shades of the same color. You can also add stripes to the shell by changing colors at the beginning of a round.
- Size Matters: The size of your turtle is directly influenced by your yarn weight and hook size. Using a finer yarn and a smaller hook will result in a miniature turtle, perfect for keychains or as part of a larger display. Conversely, a bulkier yarn and a larger hook will create a supersized, cuddly companion.
- Embellishments: Add personality with embroidered features like a little smile or freckles. You could also add tiny crochet flowers or leaves to attach to your turtle. Consider adding a small crochet hat or scarf for extra flair!
- Shell Patterns: While this pattern likely has a standard shell, you can experiment with adding textured stitches within the shell rounds, like bobbles or popcorn stitches, for a more intricate and unique carapace.
### Care Instructions: Keeping Your Turtle Snuggly
To keep your beloved crochet turtle looking its best for years to come, proper care is essential.
- Washing: For most acrylic or cotton yarns, hand washing in cool water with a mild detergent is the safest bet. Gently squeeze out excess water without wringing, as this can distort the shape.
- Drying: Reshape your turtle and lay it flat on a clean towel to air dry. Avoid direct sunlight or heat, which can cause colors to fade or yarn to shrink.
- Spot Cleaning: For minor spills or stains, a damp cloth with a tiny bit of mild soap can often do the trick. Blot the area gently and allow it to air dry.
- Delicate Cycle: If your yarn is particularly sturdy and the pattern is well-made, you *might* be able to get away with a very gentle cycle on your washing machine, placed inside a mesh laundry bag. However, hand washing is always recommended for longevity.
### Project Ideas: Beyond Just a Turtle!
Your no-sew crochet turtle can be more than just a standalone plush. Think outside the box and consider these fun project ideas:
- Baby Shower Gift: A collection of small crochet turtles in soft colors makes for an adorable and handmade baby shower gift.
- Desk Buddy: A smaller, firmer turtle can sit on your desk, bringing a smile to your face during the workday.
- Keychains: With a slightly smaller hook and yarn, you can create tiny turtles perfect for attaching to backpacks or keys.
- Amigurumi Scene: Combine your turtle with other crocheted elements like lily pads, flowers, or even a small pond to create a charming amigurumi diorama.
- Educational Toy: For younger children, a soft, durable crochet turtle can be a safe and engaging toy.
This No-Sew Crochet Turtle Amigurumi plush is a rewarding project that offers a delightful blend of simplicity and charm. With a little practice and a lot of creativity, you’ll be crocheting a whole family of these adorable creatures in no time. So grab your yarn, hook up some magic, and dive into the wonderful world of amigurumi!
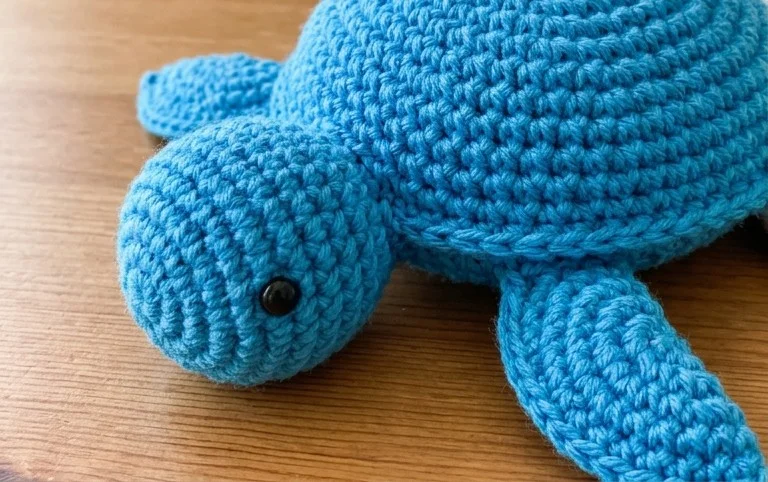
We hope you’ve enjoyed learning how to crochet this adorable no-sew turtle amigurumi! This pattern is designed for ease and speed, making it a perfect project for beginners or experienced crocheters looking for a quick and satisfying make. Don’t hesitate to dive in and create your own little shelled friend!
We’d absolutely love to see your finished turtles! Share your creations on social media using #NoSewTurtle and tag us so we can admire your handiwork. Feel free to get creative with yarn colors or add unique embellishments. And when you’re ready for your next crochet adventure, be sure to explore our other fun and easy patterns!