Hello, fellow crafters! Get ready to conjure up some spooky-cute magic this Halloween with our brand new collection of free crochet ghost doily patterns! Imagine a delicate, spectral charm gracing your tables, shelves, or windows – these adorable ghosts are the perfect blend of eerie and endearing.
Whether you’re a crochet newbie looking for a fun, quick project, or a seasoned pro seeking a festive touch for your home decor, these patterns are designed with you in mind. They’re wonderfully beginner-friendly, making them ideal for practicing basic stitches, and they create absolutely charming gifts for your ghoul-loving friends and family!
In this article, we’ll guide you step-by-step through creating these sweet specters, helping you master simple techniques to bring your ghostly creations to life. Let’s get hooking and make this Halloween the most delightfully decorated one yet!
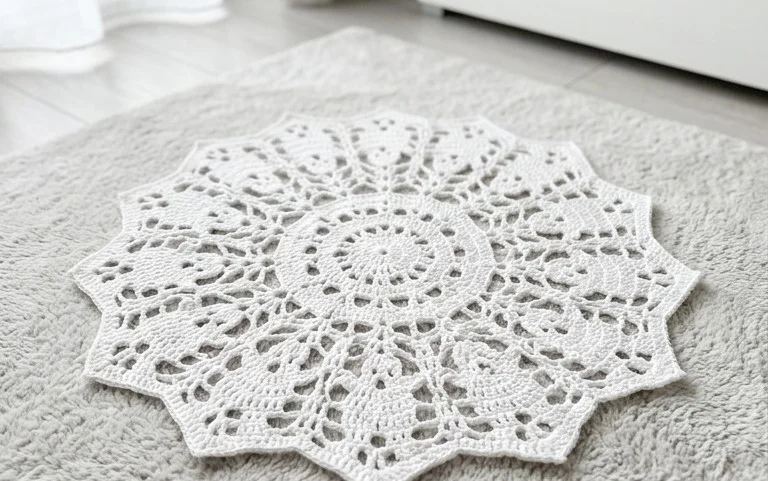
Embrace Spooky Season with These Adorable Crochet Ghost Doilies!
Halloween is the perfect time to unleash your inner crafter and add a touch of homemade charm to your décor. And what’s more iconic and delightfully spooky than a friendly ghost? This free crochet pattern for a Halloween Ghost Doily is an absolute treat, offering a fantastic way to practice your stitches and create something truly special. Whether you’re a seasoned crocheter looking for a quick and fun project or a beginner eager to dive into the world of yarn, this doily is sure to bring smiles and a touch of Halloween magic to your home.
Gathering Your Ghostly Supplies: Yarn and Hook Recommendations
The beauty of crochet projects, especially small ones like doilies, is their versatility. You can use a wide range of yarns and hooks to achieve different looks and textures. For this ghost doily, we’re aiming for a delicate yet sturdy fabric that showcases the ghostly shape beautifully.
Yarn: Cotton yarn is a fantastic choice for doilies. It has a lovely drape, holds its shape well after blocking, and is often available in a wide array of colors. For a classic ghost, a bright white or off-white cotton yarn is ideal. Consider brands like Lily Sugar ‘n Cream, Aunt Lydia’s Crochet Thread (though this is a finer thread, it would create a more intricate doily), or any other 100% cotton yarn in a worsted weight (Aran weight in UK terms). If you’re feeling extra festive, a lime green or pumpkin orange yarn can be used for the “eyes” and “mouth” details, or even for an entire alternate-colored ghost!
Hook: The hook size will largely depend on the yarn you choose. For worsted weight cotton, a 3.5mm (E-4 US, 9 UK) or 4.0mm (G-6 US, 8 UK) hook is generally a good starting point. A slightly smaller hook will create a denser fabric, while a slightly larger hook will result in a more open, lacy look. The pattern will likely specify a recommended hook size, but don’t be afraid to experiment slightly to find what feels best in your hands and gives you the desired fabric.
Mastering the Magic: Stitch Techniques You’ll Encounter
This ghost doily pattern is designed to be accessible, incorporating fundamental crochet stitches that are perfect for beginners to practice. You’ll likely encounter the following:
Chain (ch): The foundation of most crochet projects. You’ll use chains to create starting loops and to form decorative spaces within the pattern.
Single Crochet (sc): A basic, dense stitch that forms the main body of many crochet items. It’s a great stitch for creating a solid and sturdy fabric.
Half Double Crochet (hdc): A stitch that’s taller than a single crochet and shorter than a double crochet, offering a nice balance of density and height.
Double Crochet (dc): A taller stitch that creates a more open and lacy fabric. You’ll likely use this to create the billowy effect of the ghost’s bottom.
Slip Stitch (sl st): Used for joining rounds or moving yarn across stitches without adding height. It’s essential for seamless finishing and shaping.
Working in the Round: Most doilies are worked in rounds, starting from the center and spiraling outwards. This pattern will guide you through joining rounds and continuing the design in a circular fashion.
Increases: To make the doily expand and create its shape, you’ll use increases. This means working multiple stitches into the same stitch from the previous round, which naturally causes the fabric to widen.
Decreases (potentially): While less common for a simple doily, some patterns might incorporate subtle decreases to shape specific areas.
Working into Back Loops Only (BLO) or Front Loops Only (FLO): Sometimes, patterns will specify working into only one loop of a stitch. This can create interesting textures and defined edges. The ghost’s “face” might use this technique to pop out.
Tips for Aspiring Ghost Makers: A Beginner’s Guide
If you’re new to crochet, this ghost doily is an excellent first project! Here are some tips to make your journey smooth and enjoyable:
Practice Your Stitches: Before diving into the doily, take some time to practice each of the stitches mentioned above on a small swatch. This will help you get a feel for the tension and how the stitches look.
Read Through the Pattern First: Familiarize yourself with the entire pattern before you begin. Look for any abbreviations or symbols you’re not sure about and look them up.
Use a Stitch Marker: Stitch markers are your best friend for working in the round! Place one in the first stitch of each round to easily keep track of where you are and to avoid losing your place.
Don’t Be Afraid to Undo: We all make mistakes! If you notice an error a few stitches back, it’s better to frog (undo) it and fix it than to continue and have a wonky doily.
Maintain Consistent Tension: Try to keep your yarn tension as consistent as possible. This will result in a more uniform and professional-looking finished piece. If your stitches are too tight, the fabric will be stiff; if too loose, it will be floppy.
Blocking is Your Friend: Once your doily is complete, blocking is a crucial step for doilies. It helps to even out your stitches, open up any lacy sections, and shape the doily to its intended design. You can use blocking mats, pins, and a bit of water or steam to achieve this.
Personalizing Your Phantom: Customization Ideas
The beauty of this free pattern lies in its adaptability. Don’t be afraid to inject your own personality and creativity into your ghost doily!
Color Play:
Classic White Ghost: The traditional choice, perfect for a subtle and elegant Halloween touch.
Spooky Black Ghost: For a bolder, more dramatic statement.
Vibrant Colors: Use bright oranges, purples, or even multi-colored yarns for a fun and whimsical look.
Gradient Yarn: Experiment with self-striping or gradient yarns for unique color transitions.
Contrast Face: Work the main ghost in white and then use black, orange, or even a metallic yarn to crochet the eyes and mouth, sewing them on securely.
Size Variations:
Smaller Doily: Use a finer weight yarn and a smaller hook. You’ll likely need to work fewer rounds.
Larger Doily: Use a bulkier yarn and a larger hook. You might need to add extra rounds to achieve your desired size, following the pattern’s increase logic.
Adding Embellishments:
Sequins or Beads: For a touch of sparkle, sew on small sequins or beads for the eyes or to add extra detail.
Embroidery: Use embroidery floss to add embroidered details to the ghost’s face for a more intricate look.
Lace Trim: Once the doily is complete, you could crochet a delicate lace border around the edge for an extra touch of elegance.
Keeping Your Ghostly Creation Pristine: Care Instructions
To ensure your handmade Halloween ghost doily remains a cherished decoration for years to come, proper care is essential.
Hand Wash Recommended: For best results, gently hand wash your doily in cool water with a mild detergent. Avoid harsh chemicals or bleach.
Rinse Thoroughly: Make sure to rinse out all the soap residue.
Gently Squeeze, Don’t Wring: Do not wring or twist the doily, as this can distort its shape. Instead, gently squeeze out excess water.
Reshape and Lay Flat to Dry: Lay the doily flat on a clean, dry towel. Gently reshape it to its original dimensions. You can also use blocking mats and pins to achieve the perfect shape. Allow it to air dry completely.
Avoid Machine Washing and Drying: Unless the yarn label specifically states otherwise and you are very careful with cycle settings, it’s best to avoid machine washing and drying altogether.
Beyond the Table: Creative Project Ideas
This adorable ghost doily is more than just a table accent! Here are some creative ways to use your finished creation:
Window Decorations: Hang them in your windows for a spooky, translucent effect.
Garlands: String several doilies together to create a charming Halloween garland.
Gift Toppers: Use them as unique and handmade toppers for Halloween gifts.
Appliqués: Sew them onto fabric projects like tote bags, pillows, or even clothing for a festive touch.
Centerpieces: Place them under small Halloween figurines or pumpkins as part of your table display.
Jar Covers: Drape them over the tops of jars filled with candy or fairy lights.
Wall Art: Frame a few of them for a sophisticated and spooky wall art display.
This Halloween Ghost Doily free crochet pattern is a delightful way to celebrate the season. With just a few basic stitches and a little bit of yarn, you can create a charming decoration that will bring a smile to everyone who sees it. Happy crocheting, and have a spooktacularly crafty Halloween!
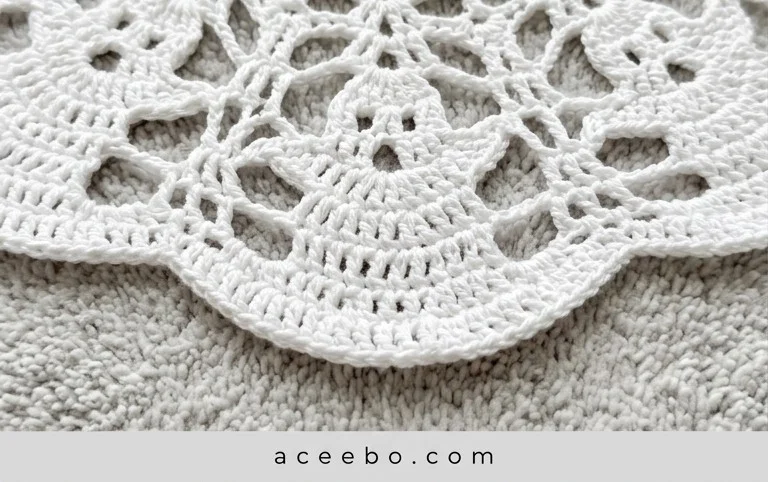
There you have it – your spooktacular crochet ghost doily awaits! We hope you’ve enjoyed these free patterns and are eager to bring these friendly phantoms to life. Don’t be shy; grab your hook and yarn and give these patterns a try! We’d absolutely love to see your finished creations. Share your ghostly doilies on social media using #HalloweenGhostDoily and tag us so we can admire your handiwork!
Feeling inspired to get even more creative? Consider experimenting with different yarn colors for a unique twist, or perhaps adding a touch of glow-in-the-dark yarn for an extra eerie effect. The possibilities are endless! And when you’re ready for your next crochet adventure, be sure to explore more delightful patterns right here on DIY Magazine.